Plymouth 交互
就俩基本对象: Image 和 Sprite
Plymouth Images
To create a new image you need to supply the filename of the image within the theme image directory to Image, e.g.
box_image = Image ("box.png");
logo_image = Image ("special://logo");   # "special://logo" is a special keyword which finds the logo image
You can also create images from text. These are useful to show text messages, e.g.
warning_image = Image.Text ("System running FSCK. This may take some time");
The default is white text color, but you can supply additional parameters of: red, green, blue, alpha, fontname and alignment. Default font is "Sans 12" and default alignment is "left". Alignement is only useful for multi-line text, and its possible values are "left", "center", or "right".
warning_image = Image.Text ("I feel faded", 0.8, 0.8, 0.8, 0.8, "Fixed");
The width and height of an image can be attained using GetWidth and GetHeight, e.g.
logo_area = logo_image.GetWidth() * logo_image.GetHeight();
An image can be rotated or scaled using Rotate and Scale, e.g.
upside_down_logo_image = logo_image.Rotate (3.1415); # the second paramiter is the angle in radians
fat_logo_image = logo_image.Scale (logo_image.GetWidth() * 2 , logo_image.GetHeight ()) # make the image twice the width
Plymouth Sprites
To place an image on the screen, we use sprites.
To create a new sprite call Sprite, then set the image using SetImage, e.g.
my_sprite = Sprite ();
my_sprite.SetImage (fat_logo_image);
You can also set the image while creating the sprite by supplying it to the constructor e.g.
my_sprite = Sprite (fat_logo_image);
The default placement of a new sprite is at the top left corner of the screen (at 0,0). To change the position call SetX and SetY, e.g.
my_sprite.SetX (100);
my_sprite.SetY (200);
If there are multiple sprites it us useful to decide which sprite should be shown above other. This is controlled using the Z component, the sprite with higher the Z is drawn on top.
background_sprite.SetZ (-10);
foreground_sprite.SetZ (10);
To set X, Y and Z in one call you can use SetPosition
logo_sprite.Setposition(100, 100, 0); # place at X=100, Y=100, Z=0
SetOpacity can make sprites transparent (the default opacity is solid 1) or even invisible when set to 0 , e.g.
faded_sprite.SetOpacity (0.5);
invisible_sprite.SetOpacity (0);
It is also possible to get the X/Y/Z/Opcaity/Image properties of a sprite.
sprite.SetOpacity(sprite.GetOpacity()/2);
sprite.SetPosition(sprite.GetX()+1, sprite.Gety()+1, sprite.GetZ());
sprite.SetImage(sprite.GetImage().Rotate(0.1));
Knowing the size of the window can be useful to position sprites. This can be reached using Window.GetWidth and Window.GetHeight, e.g.
centred_sprite.SetX (Window.GetWidth ()  / 2 - centred_sprite.GetImage().GetWidth()  / 2);
centred_sprite.SetY (Window.GetHeight () / 2 - centred_sprite.GetImage().GetHeight() / 2);
If the sprites do not fully cover the whole window, some of the sprite background will be exposed. To set the background colours use Window.SetBackground{Top,Bottom}Color. These take Red, Green and Blue values between 0 and 1, e.g.
Window.SetBackgroundTopColor (0, 0, 1);           # Nice blue on top of the screen fading to
Window.SetBackgroundBottomColor (0.8, 0.2, 0.1);  # an equally nice brown on the bottom
Plymouth Callbacks
Calling Plymouth.SetRefreshFunction with a function will set that function to be called up to 50 times every second, e.g.
fun refresh_callback ()
{
 time++;
}
Plymouth.SetRefreshFunction (refresh_callback);
Other callbacks which can be hooked onto are:
- Plymouth.SetBootProgressFunction: the callback function is called with two numbers, time spent booting so far and the progress (between 0 and 1)
- Plymouth.SetRootMountedFunction: the callback function is called when a new root is mounted
- Plymouth.SetKeyboardInputFunction: the callback function is called with a string containing a new character entered on the keyboard
- Plymouth.SetUpdateStatusFunction: the callback function is called with the new boot status string
- Plymouth.SetDisplayPasswordFunction: the callback function is called when the display should display a password dialogue. First arg is prompt string, the second is the number of bullets.
- Plymouth.SetDisplayQuestionFunction: the callback function is called when the display should display a question dialogue. First arg is prompt string, the second is the entry contents.
- Plymouth.SetDisplayNormalFunction: the callback function is called when the display should return to normal
- Plymouth.SetMessageFunction: the callback function is called when new message should be displayed. First arg is message to display. e.g.
fun progress_callback (time, progress)
{
 progress_status = "We have waited " + time + "seconds and we are "+ (progress * 100) + "% though";
 ...
}
Plymouth.SetBootProgressFunction (progress_callback);
To determine the mode of operation plymouth was started in use Plymouth.GetMode which returns a string of one of: "boot", "shutdown", "suspend", "resume" or unknown.
if (Plymouth.GetMode () == "suspend")
{
 ShowSuspendBackground();
}
Mathematics Functions
There are some basic mathematics functions to
- Math.Abs: Absolute (positive) of a number
- Math.Min: The smaller of two numbers
- Math.Max: The greater of two numbers
- Math.Clamp: Takes 3 numbers, value, min and max. Function forces the value to be between min and max, otherwise either min or max are returned.
- Math.Pi: The value of Pi (3.14159...)
- Math.Cos: Cosine function
- Math.Sin: Sine function
- Math.Tan: Tangent function
- Math.ATan2: Arc tangent function taking 2 values (see "man atan2")
- Math.Sqrt: Square root
- Math.Int: Returns the rounded down integer.
- Math.Random: Returns a pseudo random number between 0 and 1.
举个例子
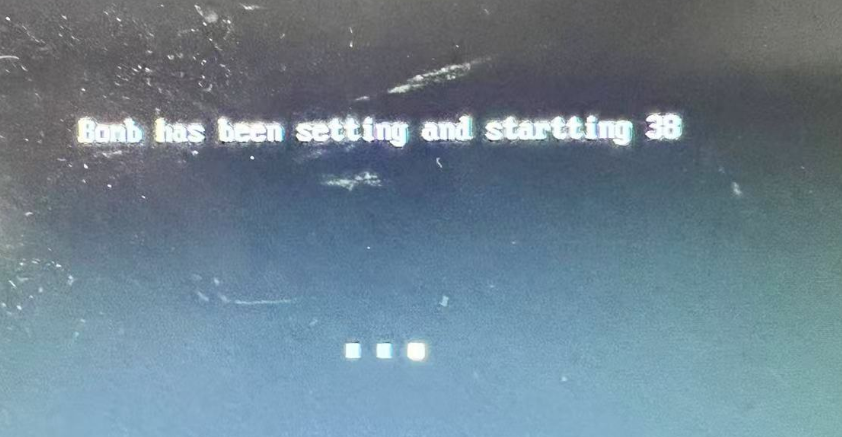
while true; do sudo plymouthd ; for i in `seq 1 100|sort -rn `; do sudo plyouth display-message --text="Bomb has been setting and startting $i" ; sudo plymouth --show-splash ; sleep 1; done ; sudo plymouth --quit ; done
效果如图:
备案信息
- ICP主体备案: 沪ICP备16000100号